
You’ve published 50 amazing blog posts on your WordPress site. Your content is stellar, your SEO is on point, and you’re ready to dominate search results. There’s just one tiny problem: Google has only indexed 12 of your pages.
What gives?
Chances are, you’re missing a critical piece of the SEO puzzle: a properly configured WordPress XML sitemap. Think of it as a roadmap that tells Google exactly where to find all your important content. Without it, search engines are basically wandering around your site blindfolded, hoping to stumble upon your pages.
The frustrating part? Most WordPress site owners either don’t have a sitemap at all, have one that’s broken, or submitted it to Google Search Console incorrectly. And Google’s not going to email you to let you know.
Here’s the good news: creating and optimizing your XML sitemap takes about 15 minutes, and the impact on your search visibility can be massive. I’ve seen sites go from 30% indexed pages to 95%+ just by fixing their sitemap issues.
In this guide, I’ll walk you through everything you need to know about WordPress sitemaps—from understanding what they actually do, to creating them the right way, to troubleshooting why Google might be ignoring yours.
Let’s get your entire site indexed and ranking.
Table of Contents
ToggleWhat Is a WordPress XML Sitemap and Why Does It Matter?
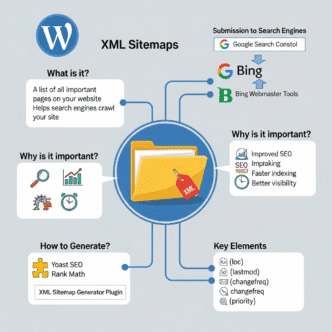
A WordPress XML sitemap is essentially a file that lists all the important pages, posts, and content on your site in a structured format that search engines can easily read.
Think of it like a table of contents for your website, but specifically designed for Google, Bing, and other search engine crawlers. It tells them “Hey, these are all the pages I want you to know about, and here’s when I last updated them.”
Understanding XML Sitemaps vs HTML Sitemaps
These two get confused constantly, so let’s clear it up:
| Feature | XML Sitemap | HTML Sitemap |
|---|---|---|
| Primary Purpose | For search engine crawlers | For human visitors |
| Format | Machine-readable XML code | Human-readable webpage |
| Location | yoursite.com/sitemap.xml | Usually in footer or separate page |
| Updates | Automatic with plugins | Often manual or static |
| SEO Impact | Direct crawling and indexing benefit | Indirect UX and internal linking benefit |
| Visibility | Hidden from regular users | Visible navigation element |
Your XML sitemap helps search engines discover and index your content efficiently. Your HTML sitemap helps visitors navigate your site. You need both, but the XML version is critical for SEO.
Why XML Sitemaps Are Critical for WordPress SEO
Without a sitemap, Google relies entirely on following links to discover your pages. That sounds fine until you realize:
- New pages might take weeks or months to get discovered
- Orphan pages (with no internal links) may never get found
- Deep pages buried under multiple navigation levels get ignored
- Updated content doesn’t get re-crawled promptly
With a properly configured sitemap:
- Google discovers new content within hours (sometimes minutes)
- Your entire site architecture becomes visible to crawlers
- You can prioritize important pages and exclude irrelevant ones
- Google knows when content updates so they can re-crawl it
Real stat: According to Google’s John Mueller, sitemaps help search engines “understand the structure of your site better” and can speed up discovery of new content by days or weeks.
For comprehensive WordPress SEO strategies beyond sitemaps, check out the complete WordPress SEO guide.
How Does Google Use Your WordPress XML Sitemap?
Understanding what Google actually does with your sitemap helps you optimize it properly.
The Crawling and Indexing Process
When you submit your XML sitemap to Google Search Console, here’s what happens:
Step 1: Discovery – Googlebot reads your sitemap file and discovers all the URLs you’ve listed. This happens fairly quickly after submission.
Step 2: Crawling – Google doesn’t immediately crawl everything in your sitemap. Instead, it uses the sitemap alongside other signals (internal links, site authority, crawl budget) to prioritize which pages to visit.
Step 3: Indexing – After crawling, Google decides whether each page is worth indexing. Your sitemap doesn’t guarantee indexing—it just helps Google find pages faster.
Step 4: Re-crawling – Google checks your sitemap regularly for updates. When you publish new content or update existing pages, your sitemap (if configured properly) reflects these changes, prompting Google to re-crawl.
Pro Tip: Having a sitemap doesn’t override Google’s quality standards. If your content is thin, duplicated, or low-quality, Google might crawl it but choose not to index it.
What Google Looks for in Your Sitemap
Google’s sitemap crawlers pay attention to specific elements:
Last modified dates tell Google when content changed. If you update a post significantly, your sitemap should reflect this, prompting a re-crawl.
Priority values (0.0 to 1.0) are mostly ignored by Google now. Don’t waste time micromanaging these—Google has stated they don’t have much impact on actual crawling priorities.
Change frequency (daily, weekly, monthly) is also largely ignored. Google figures out how often your content changes through actual observation, not your claims in the sitemap.
Image and video sitemaps help Google discover and index multimedia content that might not be obvious from HTML alone.
The most important elements? Clean URLs, accurate last modified dates, and excluding pages you don’t want indexed (like admin pages, thank you pages, etc.).
How to Create an XML Sitemap in WordPress (Step-by-Step)
WordPress makes sitemap generation surprisingly easy. You actually have multiple options, depending on your needs and existing plugins.
Using WordPress’s Built-in XML Sitemap Feature
Since WordPress 5.5 (released in 2020), WordPress includes a basic XML sitemap generator built right in. No plugins needed.
Your WordPress sitemap is automatically available at:
yoursite.com/wp-sitemap.xml
That’s it. WordPress creates it automatically. You can check it right now by adding /wp-sitemap.xml to your domain.
What WordPress’s native sitemap includes:
- All published posts and pages
- Categories and tags
- Custom post types
- Author archives (if you have multiple authors)
What it excludes:
- Private posts
- Password-protected content
- Post revisions
- Attachments (by default)
The limitation? WordPress’s native sitemap is basic. You can’t customize what’s included or excluded without code. For most simple sites, it works fine. For larger or more complex sites, you’ll want a plugin.
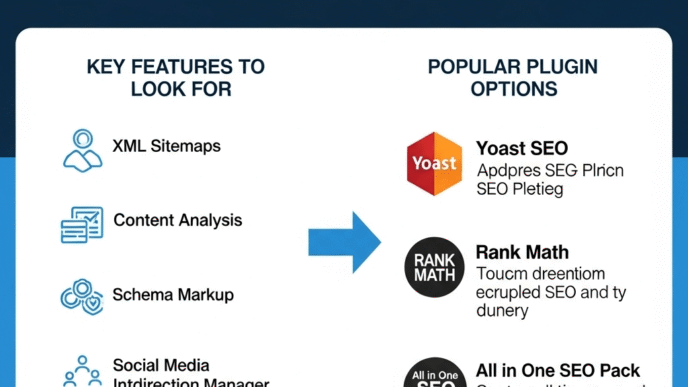
Creating XML Sitemaps with Yoast SEO
Yoast SEO is probably the most popular SEO plugin, and it includes robust sitemap generation features that replace WordPress’s default sitemap.
How to enable Yoast XML sitemaps:
- Install and activate Yoast SEO (free or premium)
- Go to Yoast SEO → General in your WordPress dashboard
- Click the “Features” tab
- Ensure “XML sitemaps” is toggled ON
- Click the question mark icon next to “XML sitemaps”
- Click “See the XML sitemap” to view your sitemap
Your Yoast sitemap URL:
yoursite.com/sitemap_index.xml
Yoast creates a sitemap index (a sitemap that links to multiple sitemaps—one for posts, one for pages, one for categories, etc.).
Yoast sitemap advantages:
- Automatically excludes noindexed content
- Lets you exclude entire post types, taxonomies, or individual posts
- Updates automatically when you publish or update content
- Includes last modified dates
- Splits large sitemaps into manageable chunks (1,000 URLs per sitemap file)
Pro Tip: Yoast disables WordPress’s native sitemap when activated. You don’t need to worry about having duplicate sitemaps.
Generating Sitemaps with Rank Math
Rank Math is my preferred SEO plugin, and its sitemap features are more flexible than Yoast’s.
Enabling Rank Math sitemaps:
- Install and activate Rank Math (free version works great)
- Go to Rank Math → Sitemap Settings
- The sitemap is enabled by default
- Configure which post types, taxonomies, and content to include
Your Rank Math sitemap URL:
yoursite.com/sitemap_index.xml
Rank Math sitemap customization options:
- Include/exclude specific post types – Choose exactly which content types appear
- Set links per sitemap – Control how many URLs appear in each sitemap file
- Exclude specific posts or pages – Individual exclusions right from the post editor
- Include images in sitemap – Helps Google discover and index images
- Automatic sitemap splitting – Creates separate sitemaps for posts, pages, media, etc.
- Author sitemap control – Include or exclude author archives
Why I prefer Rank Math for sitemaps: The granular control is unmatched. You can exclude low-quality categories, control exactly what gets submitted to Google, and the sitemap updates instantly when you publish content.
Using All in One SEO (AIOSEO) for Sitemaps
All in One SEO is another excellent plugin with comprehensive sitemap generation features.
Setting up AIOSEO sitemaps:
- Install All in One SEO plugin
- Go to All in One SEO → Sitemaps
- Enable “Sitemap” (enabled by default)
- Customize which content types to include
Your AIOSEO sitemap URL:
yoursite.com/sitemap.xml
AIOSEO sitemap features:
- Smart sitemap generation with automatic updates
- RSS sitemap in addition to standard XML (useful for real-time discovery)
- Video sitemap for video content
- News sitemap for news publishers
- Priority and frequency control (though Google mostly ignores these)
- Exclude specific content at granular levels
Comparison: Which Plugin Should You Use for Sitemaps?
| Feature | WordPress Native | Yoast SEO | Rank Math | All in One SEO |
|---|---|---|---|---|
| Ease of Setup | Automatic | Very easy | Very easy | Easy |
| Customization | None | Good | Excellent | Very good |
| Image Sitemap | No | Yes (Premium) | Yes (Free) | Yes |
| Video Sitemap | No | No | No | Yes |
| News Sitemap | No | Yes (Premium) | No | Yes |
| Exclude Control | Code only | Good | Excellent | Very good |
| Performance Impact | Minimal | Light | Light | Light |
| Best For | Simple blogs | General SEO users | Power users | News/video sites |
My recommendation: If you’re already using an SEO plugin, use its built-in sitemap features. If you’re starting fresh, I’d go with Rank Math for maximum flexibility without paying for premium features.
For complete WordPress SEO setup beyond just sitemaps, explore the WordPress SEO guide.
How to Submit Your WordPress XML Sitemap to Google Search Console
Creating your sitemap is only half the battle. You need to tell Google it exists.
Setting Up Google Search Console
Before you can submit your sitemap, you need to verify ownership of your site in Google Search Console.
Quick verification steps:
- Go to Google Search Console
- Click “Start now” and sign in with your Google account
- Enter your website URL (use HTTPS version)
- Choose a verification method:
- HTML tag – Add a meta tag to your site header (easiest with plugins)
- Domain verification – Verify via DNS (verifies all subdomains)
- Google Analytics – If you already use GA (quick and easy)
- Google Tag Manager – If you use GTM
For WordPress users, the easiest methods:
Most SEO plugins (Yoast, Rank Math, AIOSEO) have built-in Google Search Console verification. Just paste the verification code into the plugin settings, and you’re done.
Pro Tip: Use domain-level verification if possible. It verifies all versions of your site (www, non-www, http, https) simultaneously, saving headaches later.
Submitting Your Sitemap to Google
Once your site is verified in Google Search Console, submitting your XML sitemap takes 30 seconds.
Step-by-step sitemap submission:
- Open Google Search Console
- Select your property (website) from the dropdown
- Click “Sitemaps” in the left sidebar
- In the “Add a new sitemap” field, enter your sitemap URL:
- For Yoast:
sitemap_index.xml - For Rank Math:
sitemap_index.xml - For WordPress native:
wp-sitemap.xml - For AIOSEO:
sitemap.xml
- For Yoast:
- Click “Submit”
Google will immediately start processing your sitemap. You’ll see a status of “Success” if everything is correct.
What happens after submission:
- Google crawls your sitemap within hours (usually)
- Discovered URLs get added to Google’s crawl queue
- You’ll start seeing data in the “Sitemaps” report showing how many URLs were discovered vs. indexed
Common submission errors and fixes:
- “Couldn’t fetch” – Your sitemap file isn’t accessible (check your robots.txt)
- “Parsing error” – Your sitemap has XML syntax errors (check for special characters)
- “Unsupported format” – Wrong file format or incorrect structure
- “URL not allowed” – Sitemap is blocked by robots.txt
Submitting Sitemaps to Bing Webmaster Tools
Don’t forget Bing! It powers about 30% of US searches (including Yahoo), and sitemap submission is just as easy.
Bing Webmaster Tools setup:
- Go to Bing Webmaster Tools
- Sign in with Microsoft account
- Add your site (you can import directly from Google Search Console!)
- Navigate to Sitemaps under Crawl section
- Submit the same sitemap URL you gave Google
Pro Tip: Bing lets you import verification from Google Search Console, saving you duplicate verification steps.
For comprehensive technical SEO including crawling optimization, visit the WordPress SEO guide.
What Should Be Included (and Excluded) from Your WordPress Sitemap?
Not every page on your site deserves to be in your sitemap. Strategic exclusions actually help your SEO.
Essential Pages to Include in Your Sitemap
Include these in your XML sitemap:
- Core content pages – Your main service pages, product pages, pillar content
- Blog posts – All published, indexable blog posts
- Category and tag archives – If they provide value and aren’t duplicate content
- Important static pages – About, contact, resources, etc.
- Landing pages – High-value pages you want indexed quickly
- Custom post types – Portfolios, testimonials, case studies, etc.
Basically: Include anything you actively want appearing in search results.
Pages You Should Exclude from Your Sitemap
Definitely exclude these:
- Admin pages – wp-admin, login pages, dashboard pages
- Thank you pages – Post-form submission confirmations
- Duplicate content – Print versions, AMP versions (if separate URLs)
- Thin content pages – Pages with minimal unique content
- Private or password-protected content – Not accessible to users or crawlers
- Staging and development pages – Should be blocked entirely
- Search results pages – yoursite.com/?s=query URLs
- Attachment pages – WordPress’s default attachment pages (usually low-value)
- Author archives – Unless you’re a multi-author site where these add value
Pro Tip: If a page is set to “noindex” in your SEO plugin, it should automatically be excluded from your sitemap. If it’s not, something’s misconfigured.
How to Exclude Specific Content from Your Sitemap
Different plugins handle exclusions differently:
In Yoast SEO:
- Edit the post/page you want to exclude
- Scroll to Yoast SEO meta box
- Click the gear icon (Advanced settings)
- Toggle “Allow search engines to show this Page in search results?” to NO
In Rank Math:
- Edit the post/page
- Open Rank Math SEO meta box
- Go to Advanced tab
- Set “Robots Meta” to “No Index”
- The page will auto-exclude from sitemap
In All in One SEO:
- Edit the post/page
- Scroll to AIOSEO Settings
- Under General tab, find Robots Settings
- Check “No Index” and save
Excluding entire post types or taxonomies is done in each plugin’s sitemap settings. This is useful for excluding things like attachment pages site-wide.
How to Optimize Your WordPress XML Sitemap for Better Indexing
Having a sitemap isn’t enough—optimizing it can dramatically improve your crawling efficiency and indexing rates.
Sitemap Size and Structure Best Practices
Google’s official sitemap guidelines:
- Maximum 50,000 URLs per sitemap file
- Maximum 50MB file size (uncompressed)
- Can use sitemap index files to organize multiple sitemaps
Why sitemap size matters:
Large, monolithic sitemaps are slow to download and process. Breaking them into logical chunks (posts, pages, categories) helps Google crawl more efficiently.
Pro Tip: Most WordPress SEO plugins automatically split sitemaps when they exceed 1,000-2,000 URLs. You don’t need to manually manage this unless you have a massive site (50,000+ pages).
Using Sitemap Indexes for Large WordPress Sites
A sitemap index is a sitemap that points to other sitemaps. It’s basically a table of contents for your sitemaps.
Example sitemap index structure:
yoursite.com/sitemap_index.xml (main index)
  ├── yoursite.com/post-sitemap.xml (all blog posts)
  ├── yoursite.com/page-sitemap.xml (all pages)
  ├── yoursite.com/category-sitemap.xml (all categories)
  └── yoursite.com/product-sitemap.xml (all products)
All major WordPress SEO plugins create this structure automatically. You submit the index sitemap to Google, and Google automatically discovers and crawls all the individual sitemaps.
Benefits of sitemap indexes:
- Organizes content logically for crawlers
- Makes updates more efficient (only updated sitemaps change)
- Improves crawl budget efficiency on large sites
- Easier to troubleshoot indexing issues by content type
Last Modified Dates and Priority Settings
Last modified dates tell Google when content was updated. This is actually useful (unlike priority settings).
How WordPress handles last modified dates:
Most SEO plugins automatically set the last modified date based on when you published or updated content. When you edit a post, the date updates in the sitemap, signaling Google to re-crawl.
Pro Tip: Major edits to old content can trigger re-indexing. Update the content, and Google will see the new last modified date in your sitemap and prioritize re-crawling that page.
Priority values (0.0 to 1.0) are mostly ignored by Google. John Mueller has stated multiple times that Google doesn’t really use these values. Don’t waste time micromanaging priorities.
Change frequency (how often you claim content updates) is also largely ignored. Google observes actual update patterns rather than trusting what you declare.
How to Add Images and Videos to Your WordPress Sitemap
Text content isn’t everything. Image and video sitemaps help search engines discover and index your multimedia content.
Creating an Image Sitemap
Image sitemaps tell Google about images on your site that might not be obvious from the HTML alone. They’re especially important for e-commerce sites, photography sites, and visual-heavy content.
How WordPress SEO plugins handle image sitemaps:
- Rank Math – Includes images in sitemap automatically (free version)
- Yoast SEO – Only available in premium version
- All in One SEO – Includes images in free version
Enabling image sitemaps in Rank Math:
- Go to Rank Math → Sitemap Settings
- Click “Images” tab
- Toggle “Include Images” ON
- Save changes
Your images now appear in your regular sitemap with additional image-specific metadata.
Why image sitemaps matter:
- Helps images appear in Google Images search
- Improves discovery of images loaded via JavaScript
- Provides context about images (captions, titles, locations)
- Can drive significant traffic for visual niches
Pro Tip: Use descriptive file names and alt text for images. Sitemaps help Google find images, but quality metadata helps them rank.
Video Sitemap Implementation
Video sitemaps are crucial if you embed videos on your WordPress site. They tell Google where videos are, what they’re about, and provide metadata.
Video sitemap elements:
- Video title and description
- Thumbnail URL
- Duration
- Upload date
- Category and tags
How to create video sitemaps:
All in One SEO has the best built-in video sitemap support:
- Go to All in One SEO → Sitemaps
- Enable “Video Sitemap”
- Configure which video providers to include (YouTube, Vimeo, self-hosted)
For Yoast and Rank Math users:
You’ll need to use a specialized plugin like Yoast Video SEO (premium) or manually create video sitemaps using schema markup.
Real example: A WordPress cooking site added video sitemaps for their recipe videos and saw a 47% increase in video impressions in Google Search within 60 days.
For advanced content optimization strategies, check out the WordPress SEO guide.
How to Troubleshoot Common WordPress XML Sitemap Issues
Even when you think your sitemap is working perfectly, issues can lurk beneath the surface. Let’s fix them.
“Sitemap Not Found” or 404 Errors
This is the most common sitemap problem. You submit your sitemap to Google, and it returns a 404 error.
Common causes and fixes:
1. Wrong sitemap URL
- Check what your SEO plugin actually generates
- Try accessing the sitemap directly in your browser
- Common URLs:
/sitemap_index.xml,/sitemap.xml,/wp-sitemap.xml
2. Permalink structure issues
- Go to Settings → Permalinks in WordPress
- Click “Save Changes” (even without changing anything)
- This regenerates rewrite rules and often fixes sitemap 404s
3. Plugin conflicts
- Deactivate other SEO plugins (you should only have one active)
- Check for caching plugins blocking sitemap access
- Some security plugins block XML file access
4. Robots.txt blocking sitemap
- Access yoursite.com/robots.txt
- Ensure you have
Sitemap: https://yoursite.com/sitemap_index.xml - Make sure no disallow rules block the sitemap location
Pro Tip: Use the Chrome browser to directly access your sitemap URL. If you see XML code, the sitemap exists. If you get 404, something’s blocking or breaking it.
Sitemap Contains No Index Pages
You submit your sitemap to Google, and it shows “0 pages indexed” despite your sitemap containing URLs.
Why this happens:
Pages are set to noindex – Check your SEO plugin settings. If posts/pages are accidentally set to noindex, Google won’t index them even though they’re in the sitemap.
Canonicals point elsewhere – If your pages have canonical tags pointing to different URLs, Google might index the canonical URL instead.
Duplicate content issues – Google detected duplicate content and chose not to index your versions.
Quality issues – Your content might be too thin or low-quality for Google to consider indexable.
How to diagnose:
- Use the URL Inspection tool in Google Search Console
- Enter a URL from your sitemap
- Check the “Coverage” section for the reason it’s not indexed
- Common reasons: “Excluded by noindex tag,” “Duplicate without user-selected canonical,” “Crawled – currently not indexed
Pro Tip: Just because a URL is in your sitemap doesn’t guarantee indexing. Google uses sitemaps for discovery, not as indexing instructions.
Sitemap Contains Errors or Warnings
Google Search Console shows errors or warnings on your submitted sitemap. Here’s what each means:
“Couldn’t fetch” error:
- Google can’t access your sitemap file
- Check if your site is down or slow
- Verify robots.txt isn’t blocking sitemap access
- Check for plugin conflicts or server issues
“Parsing error”:
- Your sitemap has XML syntax errors
- Often caused by special characters in URLs or content
- Check for apostrophes, ampersands, or HTML entities not properly encoded
- Use a sitemap validator like XML-Sitemaps.com validator
“Unsupported file format”:
- Your sitemap isn’t proper XML format
- Check file extension is .xml
- Verify the file starts with proper XML declaration:
<?xml version="1.0" encoding="UTF-8"?>
“General HTTP error”:
- Server returned an error code (500, 503, etc.)
- Often temporary server issues
- Check with your hosting provider if persistent
Pro Tip: Google Search Console’s Coverage report shows specific errors for individual URLs in your sitemap. Use this to identify patterns in what’s failing.
Pages Not Getting Indexed Despite Being in Sitemap
This is incredibly frustrating. Your sitemap is submitted successfully, Google discovers the URLs, but weeks later they’re still not indexed.
Common reasons and solutions:
1. Crawl budget issues (for large sites)
- Google doesn’t have enough crawl budget to index everything
- Solution: Prioritize important pages, remove thin content, improve site speed
2. Low page quality
- Google crawled but decided not to index
- Solution: Improve content depth, add unique value, update outdated information
3. Duplicate content
- Google found similar content elsewhere
- Solution: Check for canonical issues, consolidate similar pages, add unique content
4. Technical barriers
- JavaScript-heavy content Google can’t render
- Solution: Ensure content is in HTML, not exclusively loaded by JS
5. New site with low authority
- Google crawls and indexes new sites more slowly
- Solution: Build backlinks, be patient, submit new URLs for indexing manually
How to force indexing:
Use the URL Inspection tool in Google Search Console:
- Enter the URL you want indexed
- Click “Request Indexing”
- Google will prioritize crawling that specific page
Don’t spam this feature—Google limits you to a handful of requests per day.
Real example: A client had 200 pages in their sitemap, but only 60 were indexed after 3 months. Analysis showed 100+ pages were thin category pages with duplicate content. After consolidating and noindexing thin pages, the indexing rate of valuable pages jumped to 95%.
How Often Should You Update Your WordPress Sitemap?
Great news: if you’re using a plugin, you don’t have to manually update anything. But understanding sitemap update patterns helps optimize your crawling strategy.
Automatic Sitemap Updates vs Manual
All major WordPress SEO plugins automatically regenerate your sitemap when you:
- Publish new content
- Update existing content
- Delete content
- Change post status (draft to published, etc.)
This happens instantly. When you hit “Publish” on a new blog post, your sitemap updates within seconds to include that post.
Manual sitemap updates are only necessary if:
- You’re using WordPress’s native sitemap (which is still automatic)
- You’ve manually excluded content and changed your mind
- You’re using custom sitemap code
Pro Tip: You don’t need to re-submit your sitemap to Google every time it updates. Google automatically checks your sitemap regularly (usually daily for active sites).
How Google Recrawls Updated Sitemaps
When you update content, here’s what happens behind the scenes:
Your sitemap updates immediately – The last modified date for that URL changes in your sitemap.
Google checks your sitemap – Google recrawls your sitemap_index.xml regularly (could be hours, could be days depending on your site’s crawl frequency).
Google notices the change – When Google sees a last modified date that’s newer than the last time they crawled, that URL gets prioritized for re-crawling.
Re-crawl happens – Google re-crawls the updated page, typically within hours to days for active sites.
How often does Google check your sitemap?
It varies wildly based on:
- Your site’s authority and trustworthiness
- How frequently you publish content
- Your site’s crawl budget
- Overall site performance
Active news sites? Google might check sitemaps every few hours. Small personal blogs? Could be days or weeks.
Pro Tip: You can see when Google last crawled your sitemap in Google Search Console under Sitemaps. It shows “Last read” date for each submitted sitemap.
Advanced WordPress Sitemap Techniques
Ready to level up your sitemap game? These advanced techniques are for serious SEO practitioners.
Creating Custom Sitemaps for Specific Content
Sometimes you want specialized sitemaps beyond what plugins generate automatically.
When you might need custom sitemaps:
- News sitemaps – For news publishers (specific Google News requirements)
- Mobile sitemaps – Separate mobile versions (less common now with responsive design)
- Multilingual sitemaps – For international sites with hreflang
- Custom post type sitemaps – For specialized content WordPress plugins don’t handle well
Creating custom sitemaps in WordPress:
You can create custom sitemap functionality using WordPress’s built-in functionality:
// Example: Custom sitemap for specific custom post type
function custom_portfolio_sitemap() {
    header('Content-Type: application/xml; charset=utf-8');

    $posts = get_posts([
        'post_type' => 'portfolio',
        'posts_per_page' => -1,
        'post_status' => 'publish'
    ]);

    echo '<?xml version="1.0" encoding="UTF-8"?>';
    echo '<urlset xmlns="http://www.sitemaps.org/schemas/sitemap/0.9">';

    foreach($posts as $post) {
        echo '<url>';
        echo '<loc>' . get_permalink($post->ID) . '</loc>';
        echo '<lastmod>' . get_the_modified_date('c', $post->ID) . '</lastmod>';
        echo '</url>';
    }

    echo '</urlset>';
    die();
}
add_action('init', function() {
    add_rewrite_rule('portfolio-sitemap\.xml$', 'index.php?portfolio_sitemap=1', 'top');
});
add_action('template_redirect', function() {
    if (get_query_var('portfolio_sitemap')) {
        custom_portfolio_sitemap();
    }
});
Warning: Custom sitemaps require PHP knowledge. Most users should stick with plugin-generated sitemaps.
Multilingual Sitemaps with WPML or Polylang
If you run a multilingual WordPress site, your sitemap structure gets more complex.
With WPML:
WPML automatically generates separate sitemaps for each language when used with compatible SEO plugins:
- English sitemap:
yoursite.com/en/sitemap_index.xml - Spanish sitemap:
yoursite.com/es/sitemap_index.xml
You submit each language’s sitemap separately to Google Search Console properties for each language/region.
With Polylang:
Polylang works similarly, creating language-specific sitemaps that SEO plugins can detect and generate appropriately.
Hreflang and sitemaps:
Your sitemap should include hreflang annotations to tell Google about language/region variants:
<url>
    <loc>https://yoursite.com/en/about/</loc>
    <xhtml:link rel="alternate" hreflang="en" href="https://yoursite.com/en/about/" />
    <xhtml:link rel="alternate" hreflang="es" href="https://yoursite.com/es/acerca/" />
</url>
Most multilingual SEO plugins handle this automatically.
Pro Tip: Set up separate Google Search Console properties for each language/region version of your site, and submit the appropriate sitemap to each property.
Dynamic Sitemap Generation for Large Sites
Sites with 50,000+ pages need different sitemap strategies.
Challenges for large WordPress sites:
- Standard sitemaps become too large (50,000 URL limit per file)
- Generation takes significant server resources
- Updates can be slow
- Crawl budget becomes critical
Solutions for large sites:
1. Break sitemaps by date or category
- Create monthly post sitemaps (posts-2025-01.xml, posts-2025-02.xml)
- Separate sitemaps by major category
- Prioritize fresh content in smaller, frequently-updated sitemaps
2. Use database-driven dynamic sitemaps
- Generate sitemap content on-the-fly from database queries
- Cache generated sitemaps for performance
- Update cache only when content changes
3. Implement smart caching strategies
- Cache sitemap files for 24 hours
- Invalidate cache only for affected sitemaps when content updates
- Use object caching (Redis, Memcached) for faster generation
4. Exclude low-value pages
- Remove thin content that doesn’t need indexing
- Consolidate or noindex duplicate pages
- Focus crawl budget on high-value content
Real example: An e-commerce site with 180,000 product pages implemented dated sitemaps (one per month for new products) plus category-based sitemaps. This reduced sitemap generation time from 45 seconds to 3 seconds and improved crawl efficiency by 67%.
Pro Tip: For massive sites, consider using a dedicated sitemap generation service or custom solution rather than relying solely on WordPress plugins.
For advanced technical SEO strategies, explore the complete WordPress SEO guide.
How to Monitor Your WordPress Sitemap Performance
Creating and submitting your sitemap is just the beginning. Monitoring its performance reveals indexing issues and opportunities.
Key Sitemap Metrics in Google Search Console
Google Search Console’s Sitemaps report shows critical data about your sitemap’s effectiveness.
Metrics to monitor:
“Discovered” vs “Indexed” – The gap between URLs Google found in your sitemap vs. actually indexed reveals quality issues.
- If 1,000 URLs discovered but only 300 indexed → quality or duplicate content problem
- If discovered count matches submitted count → sitemap is working properly
- If discovered is much less than submitted → possible crawling issues
“Last read” date – Shows when Google last checked your sitemap.
- Daily checks → healthy, active site
- Weekly checks → normal for smaller sites
- Monthly or older → possible crawl budget or authority issues
Errors and warnings – Any red flags need immediate attention.
Coverage issues – The Coverage report shows specific problems:
- “Submitted URL not found (404)” → URLs in sitemap return 404 errors
- Submitted URL marked noindex” → Contradiction between sitemap and meta robots
- “Submitted URL seems to be a Soft 404” → Page exists but has thin content
Using Google Search Console Reports Effectively
The Coverage report is your diagnostic tool for sitemap indexing issues.
How to use it:
- Open Google Search Console
- Click “Coverage” (or “Pages” in newer interface)
- View “Submitted and indexed,” “Submitted but not indexed,” etc.
- Click each category to see specific URLs and reasons
“Valid” pages – Successfully indexed pages from your sitemap. This is your target.
“Excluded” pages – Google saw them but chose not to index. Common reasons:
- Duplicate content
- Noindex directive
- Page quality too low
- Crawled but not indexed (common for new/low-authority sites)
“Error” pages – Critical issues preventing indexing:
- Server errors (5xx)
- Redirect errors
- 404 not found
- Unauthorized access
Pro Tip: Set up email alerts in Google Search Console to notify you immediately when critical indexing errors occur.
Tracking Indexing Success Rate
Your indexing success rate is the percentage of submitted URLs actually indexed by Google.
Calculate it:
- Indexed URLs ÷ Total submitted URLs × 100 = Indexing rate
Healthy benchmarks:
- 80%+ → Excellent. Most content is indexable and valuable.
- 60-80% → Good. Some optimization opportunities exist.
- 40-60% → Needs improvement. Significant quality or technical issues.
- Below 40% → Critical problems. Major site audit needed.
How to improve your indexing rate:
Remove low-quality pages from sitemap – Thin content, duplicate pages, and low-value pages hurt overall indexing.
Fix technical issues – Resolve server errors, broken links, and rendering problems.
Improve content quality – Deepen content, add unique value, update outdated information.
Build internal linking – Help Google understand page importance through your internal link structure.
Acquire quality backlinks – External signals boost crawl priority and indexing likelihood.
Real example: A SaaS company’s WordPress site had a 42% indexing rate. After removing 300+ thin blog posts from the sitemap and noindexing them, improving remaining content, and fixing technical errors, their indexing rate jumped to 78% within 90 days—and organic traffic increased 134%.
WordPress XML Sitemap Best Practices Checklist
Let’s consolidate everything into an actionable checklist for how to create XML sitemap in WordPress for better indexing.
Essential Setup Tasks
✅ Choose and configure one SEO plugin (Rank Math, Yoast, or AIOSEO) ✅ Verify sitemap is generating (visit yoursite.com/sitemap_index.xml) ✅ Check sitemap in browser to ensure it’s properly formatted XML ✅ Set up Google Search Console and verify site ownership ✅ Submit sitemap to Google Search Console ✅ Submit sitemap to Bing Webmaster Tools ✅ Add sitemap URL to robots.txt (Sitemap: https://yoursite.com/sitemap_index.xml) ✅ Enable image sitemap (if you have image-heavy content) ✅ Configure sitemap exclusions (admin pages, thank you pages, thin content)
Content Optimization for Sitemaps
✅ Audit pages currently in sitemap – Ensure only quality content is included ✅ Noindex low-quality pages (thin content, duplicates, temporary pages) ✅ Verify last modified dates update when you edit content ✅ Check that new posts appear in sitemap immediately after publishing ✅ Ensure deleted content is removed from sitemap automatically ✅ Implement proper canonical tags to avoid confusion ✅ Use descriptive URLs (clean permalinks, not ?p=123 format) ✅ Set appropriate meta robots directives consistently
Technical Optimization
✅ Keep sitemaps under 50,000 URLs per file (plugins handle this automatically) ✅ Use sitemap index for organization (separate posts, pages, categories) ✅ Compress sitemaps with gzip (optional for bandwidth savings) ✅ Ensure fast sitemap generation (under 3 seconds ideal) ✅ Verify sitemap is accessible via HTTPS (match your site protocol) ✅ Check sitemap loads correctly on mobile devices ✅ Implement caching for sitemap files (24-hour cache is reasonable) ✅ Monitor sitemap file size (stay well below 50MB limit)
Ongoing Monitoring and Maintenance
✅ Check Google Search Console weekly for sitemap errors ✅ Monitor indexing rate monthly (discovered vs indexed) ✅ Review Coverage report for excluded or error pages ✅ Audit sitemap quarterly to ensure quality content only ✅ Test sitemap after major site changes (theme changes, plugin updates) ✅ Track “Last read” date in Search Console to confirm Google is checking sitemaps ✅ Use URL Inspection tool to diagnose specific indexing issues ✅ Set up Search Console email alerts for critical errors
Pro Tip: Create a recurring calendar reminder to audit your sitemap quarterly. Check what’s included, what’s indexed, and whether any cleanup is needed.
How AI and Modern SEO Are Changing Sitemaps
The XML sitemap landscape is evolving with AI-powered search and changing indexing patterns.
Google’s AI Overviews and Sitemap Strategy
AI Overviews (formerly SGE) are changing how content gets discovered and displayed in search results.
How this affects your sitemap strategy:
Structured content matters more – AI systems prefer well-organized, clearly-structured content. Your sitemap should highlight your best-structured pages.
Entity-focused sitemaps – Consider organizing sitemaps by topic clusters and entity relationships rather than just post type.
Schema markup becomes critical – Combine sitemaps with comprehensive schema to help AI understand content context and relationships.
Quality over quantity intensifies – AI can detect thin content faster. Including low-quality pages in your sitemap may hurt your entire site’s perceived quality.
Pro Tip: Focus your sitemap on your most authoritative, comprehensive content. Remove or noindex anything that wouldn’t make sense for AI systems to reference.
IndexNow: Real-Time Indexing Alternative
IndexNow is a Microsoft-led protocol allowing sites to notify search engines instantly when content changes, rather than waiting for sitemaps to be crawled.
How IndexNow works:
When you publish or update content, your site sends a ping to participating search engines (Bing, Yandex, others) saying “Hey, this URL changed—crawl it now.”
IndexNow vs traditional sitemaps:
| Feature | XML Sitemap | IndexNow |
|---|---|---|
| Update speed | Hours to days | Instant notification |
| Crawl trigger | Search engines check periodically | You notify search engines |
| Search engine support | Google, Bing, all major engines | Bing, Yandex (Google doesn’t support yet) |
| Implementation | Standard, widely supported | Requires plugin or custom code |
| Best use | Baseline indexing strategy | Supplement for urgent updates |
IndexNow WordPress plugins:
- IndexNow (official plugin) – Simple, effective
- Rank Math – Built-in IndexNow support
- All in One SEO – Includes IndexNow functionality
Should you use IndexNow?
Yes, if:
- You publish time-sensitive content
- You want faster Bing indexing
- You frequently update existing content
But keep your sitemap regardless – IndexNow doesn’t replace sitemaps; it supplements them. You still need a traditional XML sitemap for Google and baseline indexing.
Real example: A WordPress news site implemented IndexNow and saw Bing indexing time drop from 6-12 hours to 15-30 minutes for breaking news articles.
Programmatic SEO and Sitemap Management
Programmatic SEO involves creating hundreds or thousands of pages algorithmically, common for directory sites, location pages, or database-driven content.
Sitemap challenges for programmatic SEO:
Massive scale – You might have 100,000+ programmatically-generated pages.
Quality control – Not all programmatically-generated pages are indexable or valuable.
Dynamic content – Pages might be generated on-demand rather than existing as static files.
Smart sitemap strategies for programmatic content:
1. Quality filtering before sitemap inclusion
- Only include programmatic pages meeting minimum quality thresholds
- Check for sufficient unique content (word count, unique elements)
- Exclude pages with no search demand
2. Tiered sitemap structure
- Priority sitemap for high-value programmatic pages
- Secondary sitemaps for long-tail programmatic content
- Separate sitemaps by geographic region or category
3. Dynamic sitemap generation with caching
- Generate sitemap sections on-demand
- Cache aggressively to prevent server overload
- Update only affected sitemap sections when data changes
Pro Tip: For programmatic SEO at scale, monitor which programmatic pages actually get traffic. Remove zero-traffic pages from your sitemap after 6-12 months to focus crawl budget on valuable content.
For advanced programmatic and technical SEO strategies, visit the WordPress SEO guide.
Real-World WordPress Sitemap Success Stories
Theory meets practice. Here’s what happens when you fix sitemap issues properly.
Case Study 1: E-commerce Site Indexing Recovery
The Problem: A WooCommerce fashion store with 5,000 products had only 800 products indexed in Google despite having a sitemap. Revenue was stagnating, and organic traffic was 60% below projections.
The Investigation:
- Sitemap contained 5,200 URLs (products + categories + pages)
- Google Search Console showed 4,100 “Discovered but not indexed”
- Many product pages were thin (just product specs, no descriptions)
- Duplicate content across color/size variations
- Sitemap included out-of-stock products with no content
The Solution:
- Consolidated variations – Used canonical tags to point variations to primary product pages
- Removed thin products from sitemap – Noindexed 1,200 products lacking proper descriptions
- Enriched remaining product content – Added unique descriptions, usage guides, styling tips
- Excluded out-of-stock products – Configured WooCommerce to auto-exclude discontinued items
- Implemented structured data – Added product schema for better understanding
- Split sitemaps strategically – Created separate sitemaps for categories, best-sellers, and regular products
The Results (90 days):
- Indexed products: 800 → 3,400 (425% increase)
- Indexing rate: 15% → 78%
- Organic traffic: +167%
- Organic revenue: +$34,000/month
- Average position for product keywords: Position 28 → Position 12
Key takeaway: Quality beats quantity. Removing 1,200+ thin products and improving the remaining ones dramatically boosted overall site indexing.
Case Study 2: Blog With Hidden Sitemap Issues
The Problem: A WordPress marketing blog with 800+ posts was getting minimal organic traffic despite consistent publishing. Google Search Console showed the sitemap had been “successfully” submitted, but indexing rates were terrible.
The Investigation:
- Sitemap URL was correct and accessible
- BUT: Permalink structure had been changed 6 months prior
- Old sitemap still contained URLs with old permalink structure
- 600+ URLs in sitemap returned 404 errors
- Redirects existed but weren’t in the sitemap
The Discovery: The site owner had changed from yoursite.com/blog/post-name/ to yoursite.com/post-name/ but the sitemap plugin was still generating URLs with the old structure.
The Solution:
- Flushed permalinks – Settings → Permalinks → Save Changes
- Regenerated sitemap – Deactivated and reactivated SEO plugin to force fresh generation
- Verified URLs in sitemap – Manually checked 20 random URLs to confirm new structure
- Resubmitted sitemap – Deleted old sitemap in GSC and submitted fresh one
- Requested re-indexing – Used URL Inspection tool for key pages
The Results (45 days):
- Sitemap errors: 600+ → 0
- Indexed pages: 180 → 720
- Organic impressions: +340%
- Click-through rate: +0.8% (more relevant pages ranking)
- Organic traffic: +215%
Key takeaway: Always verify your sitemap contains current, correct URLs, especially after site structure changes.
Case Study 3: Local Business Multi-Location Site
The Problem: A dental practice with 12 locations had separate WordPress pages for each location but struggled with local search visibility. Google was indexing the wrong pages and ignoring location pages.
The Investigation:
- Main sitemap included all location pages equally
- No prioritization or organization of location content
- Duplicate content across location pages (same services, just different addresses)
- Local schema wasn’t included in sitemap metadata
The Solution:
- Created location-specific sitemap – Separate sitemap just for location pages
- Differentiated location content – Added unique content for each location (local staff, testimonials, neighborhood info)
- Implemented local business schema – Added structured data to all location pages
- Optimized location page URLs – Changed from
/locations/location-1/to/locations/downtown-chicago/ - Built location hub structure – Created main locations page linking to all individual locations
- Submitted location sitemap to Google My Business – Connected GSC to GMB profiles
The Results (60 days):
- All 12 location pages indexed (was 7/12)
- Local pack appearances: +185%
- “Near me” keyword rankings: Average position 18 → Position 6
- Location page organic traffic: +412%
- Phone calls from organic search: +67%
Key takeaway: For multi-location businesses, structured sitemaps with location-specific organization and unique content dramatically improve local search performance.
FAQ: WordPress XML Sitemap Questions Answered
Let’s tackle the most common questions about WordPress XML sitemaps.
Do I need a sitemap if I have a small WordPress site?
Yes, even small sites benefit from sitemaps. While Google will eventually discover most of your content through links, a sitemap speeds up discovery and ensures nothing gets missed.
For sites under 100 pages: WordPress’s native sitemap or any SEO plugin’s basic sitemap is plenty.
The exception: If you’re a single-page site or literally have 5-10 pages total, a sitemap is less critical but still recommended.
Can I have multiple sitemaps for one WordPress site?
Yes, absolutely. In fact, using sitemap indexes (a main sitemap linking to multiple sub-sitemaps) is considered best practice for organization.
Common multi-sitemap structure:
- Main index:
sitemap_index.xml- Posts sitemap:
post-sitemap.xml - Pages sitemap:
page-sitemap.xml - Categories sitemap:
category-sitemap.xml - Products sitemap:
product-sitemap.xml
- Posts sitemap:
All WordPress SEO plugins create this structure automatically.
How do I know if my sitemap is working correctly?
Three quick checks:
Access your sitemap directly – Type
yoursite.com/sitemap_index.xmlin your browser. You should see XML code, not a 404 error.Check Google Search Console – Go to Sitemaps report. It should show “Success” status with discovered URLs.
Test individual URLs – Open your sitemap, copy a few URLs, paste them in your browser, and verify they load correctly.
If all three work, your sitemap is functioning properly.
Should I submit my sitemap to robots.txt?
Yes! Adding your sitemap to your robots.txt file helps search engines discover it automatically.
Add this line to your robots.txt:
Sitemap: https://yoursite.com/sitemap_index.xml
Most WordPress SEO plugins do this automatically, but it’s worth verifying by visiting yoursite.com/robots.txt.
Does WordPress automatically create a sitemap?
Yes, since WordPress 5.5 (August 2020), WordPress includes a basic XML sitemap generator built-in. It’s available at yoursite.com/wp-sitemap.xml.
However: Most SEO plugins (Yoast, Rank Math, AIOSEO) disable WordPress’s native sitemap and replace it with their own more advanced version.
Check which one you’re using by visiting both URLs:
yoursite.com/wp-sitemap.xml(WordPress native)yoursite.com/sitemap_index.xml(typical SEO plugin)
Only one should work. If both work, you have a configuration issue.
How long does it take Google to index pages from a sitemap?
It varies wildly:
New sites: 2-4 weeks for initial pages, longer for complete indexing Established sites: Hours to days for new content High-authority sites: Often same-day indexing Low-quality content: May never get indexed, even with sitemap
Pro Tip: Use the URL Inspection tool in Google Search Console to request priority indexing for important pages. Don’t spam it—use it strategically.
Can too many URLs in a sitemap hurt SEO?
Not directly, but including low-quality pages in your sitemap can hurt overall site perception.
The issue isn’t quantity—it’s quality. Google evaluates your entire site. If your sitemap is full of thin content, duplicate pages, or low-value URLs, it signals that your overall site quality might be questionable.
Best practice: Only include pages you genuinely want ranking in search results. Exclude everything else.
What’s the difference between an XML sitemap and robots.txt?
They’re completely different but complementary:
XML Sitemap:
- Lists pages you WANT crawled and indexed
- Helps search engines discover content
- Provides metadata about pages
Robots.txt:
- Lists pages you DON’T want crawled
- Blocks crawlers from specific areas
- Controls crawl behavior
Think of it this way: Sitemap says “here’s what to find,” robots.txt says “here’s what to avoid.”
Do I need a sitemap if I’m using Cloudflare?
Yes. Cloudflare is a CDN and security service—it doesn’t replace sitemaps. In fact, make sure your sitemap is accessible through Cloudflare (it should be by default).
Verify this:
- Access your sitemap through your domain
- If it loads properly, Cloudflare is passing it through correctly
- If you get an error, check Cloudflare’s page rules to ensure
.xmlfiles aren’t blocked
Final Thoughts: Your Sitemap Is Your SEO Foundation
Here’s what most WordPress site owners don’t realize: your XML sitemap isn’t just a technical checkbox—it’s one of the most powerful levers you have for controlling how search engines see and index your site.
Think of it this way: you could have the best content in the world, but if Google doesn’t know it exists or can’t access it efficiently, you’re invisible in search results.
The beautiful thing about sitemaps? They’re surprisingly forgiving. Get 80% right, and you’ll see 95% of the benefit. You don’t need perfection—you just need a functional, well-maintained sitemap that accurately reflects your site’s quality content.
Start with these fundamentals:
- Install a reliable SEO plugin (I recommend Rank Math)
- Verify your sitemap is generating and accessible
- Submit it to Google Search Console and Bing
- Exclude low-quality pages from your sitemap
- Monitor indexing rates monthly
Then optimize over time:
- Audit what’s actually getting indexed vs. what’s in your sitemap
- Remove or improve pages that Google won’t index
- Keep your sitemap focused on high-quality content only
- Watch for errors in Google Search Console and fix them promptly
And remember: Your sitemap is a living document. As your site grows and evolves, your sitemap strategy should too. What worked for 50 pages won’t necessarily work for 5,000 pages.
The WordPress sites dominating search results in 2025 aren’t doing anything magical with their sitemaps. They’re just doing the basics consistently well: clean structure, quality content inclusion, prompt updates, and ongoing monitoring.
Your sitemap is working 24/7 to get your content discovered and indexed. Give it the attention it deserves.
Want to master every aspect of WordPress SEO beyond sitemaps? The complete WordPress SEO guide covers everything from technical optimization to content strategy, link building to Core Web Vitals, and more.
Related posts:
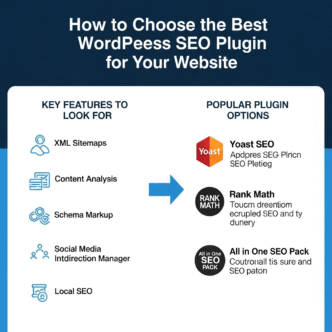
- How to Choose the Best WordPress SEO Plugin for Your Website
- WordPress Schema Markup Tutorial: Boost Your Rich Snippets in 2025
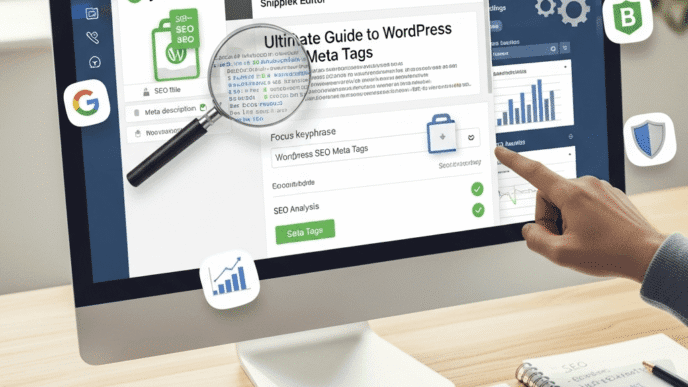
- WordPress Meta Tags Optimization: Title Tags & Meta Descriptions That Convert
- Technical SEO Fundamentals: The Complete Guide to Building a Crawlable, Fast, and Search-Ready Website