Your product is amazing. Your photos are professional. You’ve even got the keywords figured out.
But your conversion rate is stuck at 4%. Your listing sits on page 3. And your competitor with the inferior product? They’re dominating page 1 with 15% conversions.
What gives?
The difference isn’t the product—it’s the listing. Amazon listing optimization is the secret sauce that transforms mediocre performers into bestsellers. It’s not just about stuffing keywords anymore (that’ll actually hurt you in 2025). It’s about creating a persuasive, strategic listing that convinces both Amazon’s algorithm AND real customers to choose you.
In this ultimate guide, I’m breaking down exactly how to optimize Amazon product listing for sales with a proven checklist that covers every element. No theory, no fluff—just actionable tactics that boost rankings and conversions simultaneously.
Let’s turn your listing into a conversion machine.
Table of Contents
ToggleWhy Amazon Listing Optimization Matters More Than Ever
Here’s a stat that should wake you up: A well-optimized listing converts 30-50% better than a generic one.
But Amazon listing optimization isn’t just about conversion rates. It’s a three-dimensional chess game:
Dimension 1: Visibility – Get found in search (keyword optimization, backend terms, relevance score)
Dimension 2: Clicks – Make people click your listing (images, titles, pricing, reviews)
Dimension 3: Conversion – Turn clicks into sales (bullets, description, A+ Content, trust signals)
Miss any dimension, and you’re leaving thousands of dollars on the table.
The 2025 Amazon Algorithm Reality
Amazon’s A10/A13 algorithm has evolved dramatically. It now prioritizes:
User experience signals: Time on page, scroll depth, add-to-cart rate
Post-purchase behavior: Returns, repeat purchases, customer satisfaction
Natural language: Conversational, readable content over keyword stuffing
Mobile optimization: 65% of purchases happen on mobile devices
The old tactics of cramming 50 keywords into your title? Dead. Today’s winners optimize for humans first, algorithms second. Learn more about how the algorithm works in our complete Amazon SEO guide.
What Makes a Perfect Amazon Product Title?
Your title is the single most important element of Amazon title optimization. It impacts your click-through rate, keyword rankings, and conversion rate all at once.
But there’s a fine line between optimized and spammy.
The Perfect Title Formula for 2025
[Brand Name] + [Product Type] + [Key Feature 1] + [Key Feature 2] + [Benefit/Specification] + [Size/Color/Quantity]
Example (Good): “SOUNDPRO Wireless Earbuds, Bluetooth 5.3 Noise Cancelling Headphones with 48H Playtime, IPX7 Waterproof Sports Earbuds, Black”
Example (Bad): “Wireless Earbuds Bluetooth Headphones Earphones Ear Buds Noise Canceling Waterproof Sports Running Gaming Music”
See the difference? The good title is readable, informative, and naturally includes keywords. The bad title is spammy keyword soup.
Title Optimization Best Practices
Length Sweet Spot: 150-200 characters (anything longer gets cut off on mobile)
Front-Load Keywords: Put your most important keyword in the first 5 words
Use Natural Language: Write for humans who are skimming search results
Include Specifics: Numbers, measurements, and exact specifications sell
Capitalize Correctly: First Letter Of Each Word (not ALL CAPS)
Avoid Special Characters: No ™, ®, © symbols in titles (Amazon may suppress your listing)
What NOT to Include in Your Title
❌ Promotional language (“Best,” “Lowest Price,” “#1 Rated”)
❌ Seller information (“Sold by XYZ Store”)
❌ Shipping details (“Free Shipping,” “Prime Eligible”)
❌ Multiple color/size options (use variations instead)
❌ Your own subjective claims (“Amazing,” “Perfect,” “Must-Have”)
Pro Tip: Create 3-5 title variations and test them using Amazon’s Manage Your Experiments feature. A simple title tweak can boost CTR by 20%+ overnight.
How Do You Write Bullet Points That Actually Sell?
Your bullet points are where bullet point optimization transforms browsers into buyers. This is where you address objections, highlight benefits, and close the sale.
Most sellers waste this opportunity by listing boring features. Winners turn features into compelling benefits.
The Feature-Benefit Formula
[FEATURE IN CAPS]: Benefit statement that solves a problem or creates desire. Add specific details that build trust.
Example (Weak): • Long battery life
Example (Strong): ✓ 48-HOUR BATTERY LIFE: Never worry about charging mid-workout or during long flights. Each earbud provides 8 hours of continuous playtime, plus 40 additional hours from the ultra-compact charging case. Quick 10-minute charge gives you 2 hours of listening time when you’re in a rush.
See how the strong version:
- Starts with a clear, capitalized feature
- Explains the real-world benefit
- Includes specific numbers (builds credibility)
- Addresses common use cases
- Eliminates a customer objection (charging anxiety)
Bullet Point Structure That Converts
Bullet 1: Your strongest unique selling proposition (what makes you different)
Bullet 2: Second strongest benefit or most-desired feature
Bullet 3: Third key benefit with specifications
Bullet 4: Additional features or use cases
Bullet 5: Quality assurance, warranty, or customer service promise
Pro Tip: Each bullet should start with a capitalized feature keyword. This helps with SEO while maintaining readability. Aim for 200 characters per bullet—long enough to be comprehensive, short enough to stay scannable.
Bullet Point Optimization Mistakes to Avoid
❌ Repeating the title verbatim: Your bullets should expand, not duplicate
❌ Using generic language: “High quality” means nothing without specifics
❌ Ignoring customer pain points: Read your negative reviews and address concerns
❌ Writing from your perspective: Focus on what customers get, not what you made
❌ Neglecting keywords: Include secondary keywords naturally throughout bullets
What Should Go in Your Amazon Product Description?
Here’s a secret: Most customers never read your description. They decide based on images, title, and bullets alone.
So why bother with product description tips?
Because the customers who do read it are your most engaged, highest-intent buyers. These are the people comparing multiple options and doing research. Win them over, and you’ve got a customer for life.
Product Description Purpose
Your description should accomplish three goals:
1. Reinforce and expand on bullet points with more detail and context
2. Tell your brand story (humanize your product and build emotional connection)
3. Address final objections (sizing questions, compatibility, warranty details)
Winning Description Structure
Opening Hook (50-75 words): Paint a picture of the customer’s problem and how your product solves it. Make it relatable and slightly emotional.
Product Features Section (150-200 words): Deep dive into specifications, materials, construction, and technology. Use headers like “PREMIUM CONSTRUCTION” or “ADVANCED TECHNOLOGY” to break it up.
Use Cases and Benefits (100-150 words): Describe specific scenarios where your product shines. “Perfect for morning commutes,” “Ideal for home gyms,” etc.
What’s Included (50-75 words): List everything in the package. Customers want to know they’re getting complete value.
Guarantee and Support (50-75 words): Your warranty, return policy, and how to contact support. This final trust-builder closes hesitant buyers.
Pro Tip: If you have HTML editing access, use basic formatting (bold headers, line breaks, short paragraphs). A wall of text kills conversions. Make it scannable even for customers who “skim” read.
How Important Are Product Images for Conversion?
Let’s be blunt: Your main image is more important than your title.
Shocking? Maybe. But true.
In search results, customers see your main image before they read your title. If your image doesn’t stop their scroll, nothing else matters.
According to Amazon’s own data, listings with 6+ high-quality images convert 30% better than those with only 3-4 images. Images aren’t just nice to have—they’re conversion drivers.
Main Image Requirements (Amazon’s Rules)
✅ Pure white background (RGB 255, 255, 255)
✅ Product fills 85%+ of the frame
✅ Professional quality (minimum 1000px, recommend 2000px+ for zoom)
✅ No text, logos, or graphics overlay
✅ No props, models, or lifestyle elements (main image only)
✅ Product shown in use OR clean product shot (depends on category)
Pro Tip: Test different main images using Amazon’s A/B testing. Sometimes showing the product at a 45-degree angle converts better than straight-on. Sometimes showing it in-hand performs best. Data beats assumptions.
Secondary Images Strategy (Images 2-9)
Image 2: Different angle or product variation
Image 3: Lifestyle shot showing product in use (establishes context)
Image 4: Size and scale comparison (next to common objects)
Image 5: Infographic highlighting key features with text callouts
Image 6: Comparison chart (your product vs. competitors/alternatives)
Image 7: Close-up showing quality, materials, or craftsmanship
Image 8: Package contents (everything included in the box)
Image 9: Customer testimonial or before/after (if applicable)
Use all 9 slots. Each additional quality image increases the likelihood of conversion.
Image Optimization for Mobile (Critical in 2025)
65% of Amazon purchases happen on mobile. Your images MUST work on small screens:
Text must be large and legible (minimum 40pt font on infographics)
One focal point per image (don’t cram too much information)
High contrast (ensure text pops against backgrounds)
Test on actual mobile devices before finalizing
For more on visual optimization strategies, check our guide on Amazon product images that sell.
What Is A+ Content and Should You Use It?
If you’re brand registered and NOT using A+ Content (formerly Enhanced Brand Content), you’re leaving money on the table. Period.
A+ Content lets you add visual storytelling elements to your product description area with:
- High-quality lifestyle images
- Comparison charts
- Brand story modules
- Feature callouts with graphics
- FAQ sections
Does A+ Content Actually Help Rankings?
Direct impact on rankings? No. A+ Content doesn’t contain indexable text for Amazon’s algorithm.
Indirect impact on rankings? Absolutely. Here’s why:
5-10% conversion rate increase on average (Amazon’s own data confirms this)
Lower bounce rates (customers stay on page longer exploring content)
Better-informed buyers (leads to fewer returns, which helps rankings)
Increased brand trust (professional content signals quality)
Remember: Amazon’s algorithm rewards products that convert and satisfy customers. A+ Content helps both.
A+ Content Best Practices
Use the comparison chart module to position against competitors (without naming them)
Show lifestyle images with real people using your product in context
Keep text concise even in A+ sections (customers skim, don’t read novels)
Mobile-optimize everything (preview on phone before publishing)
Update seasonally if relevant (show summer use in summer, etc.)
Tell your brand story in one module (humanizes your business)
Pro Tip: Create A+ Content templates you can reuse across products with similar features. Update the specifics but maintain consistent branding and structure. This saves hours of design time.
How Do Backend Keywords Actually Work?
Backend keywords Amazon offers 249 bytes of pure SEO power that customers never see. This is where you capture searches you couldn’t fit naturally into visible content.
Think of backend keywords as your secret weapon for Amazon SEO optimization.
Backend Keyword Strategy
Include terms you couldn’t fit in title/bullets without making them awkward
Add common misspellings (yes, people search “blutooth” and “wirless”)
Use synonyms and alternative terms (“earbuds” vs “earphones” vs “in-ear headphones”)
Include British vs. American spelling (“colour” vs “color”)
Add abbreviations (“BT” for bluetooth, “NC” for noise cancelling)
Capture plural and singular forms if they differ significantly
Backend Keyword Rules
✓ Use spaces, not commas (saves characters and works better)
✓ Include terms only once (Amazon indexes them regardless of placement)
✓ No capitalization needed (Amazon ignores it anyway)
✓ No punctuation required (wastes precious characters)
✓ Order doesn’t matter (Amazon pieces together phrases)
✗ Never include brand names you don’t own (TOS violation, risks suspension)
✗ Don’t add ASINs or product IDs (useless and wastes space)
✗ Skip subjective claims (“best,” “top quality,” “perfect”)
Backend Keyword Example
Product: Wireless Bluetooth Earbuds with Noise Cancelling
Title/Bullets Already Include: wireless earbuds, bluetooth 5.3, noise cancelling, waterproof, sports
Backend Keywords Should Include: “cordless earphones in ear headphones true wireless buds pods headset airpods alternative blutooth wirless ipod compatible sweatproof workout gym running”
That’s 173 bytes capturing variations and synonyms without cluttering visible content.
Pro Tip: Update backend keywords quarterly based on your Search Term Report from PPC campaigns. This report shows exactly what customers searched before buying—pure gold for backend optimization.
Amazon Listing Optimization Checklist 2025
Ready to optimize Amazon product page for conversions? Use this comprehensive checklist.
Title Optimization Checklist
☐ Title is 150-200 characters (optimal length)
☐ Primary keyword appears in first 5 words
☐ Includes brand name at the beginning
☐ Contains 2-3 key features/benefits
☐ Specifies size, color, quantity, or variant
☐ Uses proper capitalization (First Letter Capitalized)
☐ No promotional language or subjective claims
☐ Readable and flows naturally (not keyword stuffed)
☐ Includes specific numbers/measurements
☐ Mobile preview looks good (no cut-off)
Bullet Points Optimization Checklist
☐ All 5 bullet slots filled
☐ Each bullet starts with capitalized feature keyword
☐ Uses Feature-Benefit formula throughout
☐ Addresses main customer pain points
☐ Includes specific numbers and details
☐ Each bullet is 150-250 characters
☐ Secondary keywords naturally integrated
☐ No repetition from title
☐ Focused on benefits, not just features
☐ Final bullet includes guarantee/warranty
Description Optimization Checklist
☐ Opening hook addresses customer problem
☐ Broken into scannable sections with headers
☐ Expands on bullet point details
☐ Includes brand story or company background
☐ Lists what’s included in package
☐ Addresses common questions/objections
☐ Contains warranty and support information
☐ Uses HTML formatting if possible (line breaks, bold)
☐ No walls of text (short paragraphs)
☐ Mobile-friendly (test on phone)
Image Optimization Checklist
☐ Main image meets all Amazon requirements
☐ Using all 9 available image slots
☐ Mix of product angles, lifestyle, and infographics
☐ At least one size/scale comparison image
☐ Infographic text is mobile-readable (40pt+ font)
☐ All images are 2000px+ for zoom functionality
☐ Professional quality (no pixelation or amateur photos)
☐ Shows product from multiple angles
☐ Lifestyle images show product in real use
☐ Package contents image included
Backend & Technical Checklist
☐ Backend keywords filled to 249 byte limit
☐ No repeated keywords from visible content
☐ Includes misspellings and synonyms
☐ Product properly categorized
☐ All relevant attributes filled (size, color, material)
☐ Variations properly set up (if applicable)
☐ Correct product dimensions entered
☐ Accurate weight specified
☐ Safety/compliance documents uploaded
☐ Brand Registry completed (if eligible)
A+ Content Checklist (Brand Registered Only)
☐ A+ Content published and approved
☐ Uses at least 5 content modules
☐ Includes comparison chart module
☐ Contains lifestyle images showing use cases
☐ Brand story module included
☐ Mobile preview verified
☐ All text is concise and scannable
☐ Images are high-quality and professional
☐ Seasonal updates scheduled (if applicable)
☐ Consistent branding across all modules
Pro Tip: Don’t try to optimize everything at once. Start with title and main image (biggest impact), then move to bullets, then backend keywords, then everything else. Incremental improvements compound over time.
What Are the Biggest Amazon Listing Optimization Mistakes?
Let’s talk about what not to do. These mistakes cost sellers millions in lost sales annually.
Mistake #1: Keyword Stuffing (It’s Worse Than You Think)
2015 Strategy: “Wireless Earbuds Bluetooth Headphones Earphones Ear Buds Wireless Pods Cordless Earbuds…”
2025 Reality: Amazon’s natural language processing now penalizes obvious keyword stuffing. Your click-through rate plummets because titles look spammy. Lower CTR = lower rankings.
The Fix: Write naturally for humans. Trust that Amazon’s algorithm understands synonyms and semantic relationships.
Mistake #2: Ignoring Mobile Optimization
65% of purchases happen on mobile, yet sellers still optimize only for desktop.
Common Mobile Mistakes:
- Tiny text on infographic images
- Main image doesn’t clearly show product on small screen
- Title too long (gets cut off on mobile search)
- Bullets too text-heavy (customers bounce)
The Fix: Preview every element on an actual mobile device. If you can’t read it comfortably on your phone, customers won’t either.
Mistake #3: Feature-Focused Instead of Benefit-Focused
Feature Thinking: “Made with 304 stainless steel”
Benefit Thinking: “Premium 304 stainless steel construction keeps drinks cold for 24 hours—no more lukewarm coffee during long workdays”
Customers don’t care about what something is. They care about what it does for them.
The Fix: For every feature you list, add “which means…” and explain the benefit. Then write only the benefit part in your bullets.
Mistake #4: Set-It-and-Forget-It Listings
Your listing is never “done.” Top sellers continuously:
Monitor conversion rates and identify weak points
Update based on customer reviews (address common complaints in bullets)
Refresh images seasonally (show winter use in winter, summer use in summer)
Optimize based on PPC data (Search Term Reports reveal what customers actually search)
Test variations using Amazon’s A/B testing tools
The Fix: Schedule monthly listing reviews. Make small, data-driven improvements continuously.
Mistake #5: Copying Competitors Exactly
“But the #1 seller does it this way!”
Maybe. But copying them means:
- You’re competing head-to-head with no differentiation
- They might not actually be optimized well (maybe they rank despite their listing)
- You miss opportunities to stand out
The Fix: Learn from competitors, but find unique angles they’re missing. Differentiate your messaging, highlight different benefits, target different customer segments.
Pro Tip: Read competitor reviews (especially 3-star reviews). These reveal what customers wish the product did better. Then optimize your listing to address those exact wishes.
How Do You Track Your Listing Performance?
You can’t improve what you don’t measure. These metrics tell you if your product listing SEO is working.
Essential Metrics to Track Weekly
1. Unit Session Percentage (Conversion Rate)
This is your north star metric. Unit Session Percentage = (Orders / Sessions) × 100
Target: 10-15% for most categories (varies by price point and competition)
Where to Find It: Seller Central → Business Reports → Detail Page Sales and Traffic
2. Click-Through Rate (CTR)
How often people click your listing when it appears in search results.
Target: 0.5%+ in competitive categories
Where to Find It: Advertising console (for PPC), estimate organically by (Sessions / Impressions)
3. Add-to-Cart Rate
Shows how many visitors add your product to cart (even if they don’t buy immediately).
Target: 15-25% (higher means strong interest, they’re just comparing options)
Where to Find It: Business Reports → Detail Page Sales and Traffic
4. Best Seller Rank (BSR)
Your ranking within your primary category. Lower number = better.
Target: Varies by category (top 100 in most categories = solid performance)
Where to Find It: Your product page (or track with tools like Helium 10)
How to Diagnose Listing Problems
Low impressions + low sessions = keyword problem Your listing isn’t showing up in enough searches. Need better keywords. Check our Amazon keyword research guide for tactics.
High impressions + low sessions = image/title problem People see your listing but don’t click. Main image or title needs improvement.
High sessions + low conversions = listing content problem People click but don’t buy. Bullets, description, images, or pricing need work.
High add-to-cart + low purchases = trust/price problem Interest is there, but something prevents purchase. Usually price, reviews, or shipping concerns.
Pro Tip: Use Amazon’s “Manage Your Experiments” feature to A/B test main images, titles, and A+ Content. Let data guide your optimization, not guesses.
Real-World Case Study: 4% to 14% Conversion Through Listing Optimization
Let me show you what proper Amazon FBA listing optimization looks like in action.
The Product: Bamboo Cutting Board Set
Starting Position (Month 1):
- Conversion rate: 4%
- Daily sales: 8-10 units
- Best Seller Rank: #45,000 in Kitchen category
- Monthly revenue: $7,200
The Problems Identified
Title: Generic and keyword-stuffed “Bamboo Cutting Board Set Cutting Boards Chopping Board Kitchen Board Wood Cutting Board”
Main Image: Product on plain surface (no context or scale)
Bullets: Feature-focused with no benefits “• Made from bamboo • Set includes 3 boards • Has juice groove”
Description: Wall of text, no formatting
The Optimization Strategy
Phase 1: Title Reconstruction
New Title: “KITCHENPRO Bamboo Cutting Board Set of 3 with Juice Groove, Extra Thick Wooden Chopping Boards (Large 18×12, Medium 15×10, Small 12×8), Eco-Friendly Kitchen Boards”
Changes:
- Added brand name upfront
- Specified “set of 3” early (key differentiator)
- Included specific dimensions
- Natural, readable flow
- Key benefits and features balanced
Phase 2: Image Overhaul
New Main Image: Board on modern kitchen counter with fresh vegetables nearby (shows context and scale)
Secondary Images:
- All 3 boards stacked (shows size comparison)
- Close-up of juice groove with liquid (demonstrates feature)
- Infographic: “Extra Thick 0.8″ – Won’t Warp or Crack”
- Lifestyle: Chef using board to prep meal
- Size chart comparing to common kitchen items
- Package contents: What’s included
- Before/after: New board vs. worn plastic board
- Customer testimonial graphic
Phase 3: Benefit-Driven Bullets
Old Bullet: “• Made from bamboo”
New Bullet: “✓ ECO-FRIENDLY ORGANIC BAMBOO: Sustainably sourced from renewable bamboo forests—60% harder than maple yet gentler on your knives. Unlike plastic boards that harbor bacteria, our natural bamboo is naturally antimicrobial and won’t dull your expensive chef knives.”
Every feature translated to a compelling benefit with specific details.
Phase 4: Backend Keyword Expansion
Added 45+ keywords including:
- Misspellings: “bamboo cuting board”
- Synonyms: “prep board,” “chopping block,” “butcher block”
- Use cases: “bread board,” “cheese board,” “serving board”
- Long-tail: “cutting board set kitchen,” “wood cutting board large”
The Results (After 90 Days)
Conversion rate: 14.2% (255% increase)
Daily sales: 28-32 units (280% increase)
Best Seller Rank: #3,400 in Kitchen category
Monthly revenue: $25,600 (256% increase)
Key Factors:
The new main image increased CTR by 35%
Benefit-focused bullets addressed customer objections before they arose
A+ Content showcased brand story and quality (added trust)
Backend keywords captured 40% more relevant searches
Key Takeaway
They didn’t change the product. They optimized how it was presented. Same margins, same fulfillment, same everything—just better listing best practices implementation.
That’s the power of strategic listing optimization.
Should You Use AI for Amazon Listing Optimization?
In 2025, smart sellers are leveraging AI tools to streamline Amazon content optimization. But AI is a tool, not a replacement for strategy.
How to Use AI Effectively
ChatGPT/Claude for Bullet Point Ideas:
“Generate 5 benefit-focused bullet points for a [product] that solves [customer pain point]. Use the Feature-Benefit formula and include specific details.”
AI for A+ Content Copy:
“Write a compelling brand story for a company that makes eco-friendly kitchen products. Focus on sustainability and quality craftsmanship. Keep it under 150 words.”
AI for Competitor Analysis:
“Analyze these 5 competitor titles and suggest 3 unique angles I can use to differentiate: [paste titles]”
What AI Can’t Do (Yet)
❌ Understand your specific customer avatar without deep prompting
❌ Know which keywords actually convert for your product
❌ Make strategic decisions about image selection
❌ Understand Amazon’s TOS and category-specific rules
❌ Replace the need for testing and iteration
Pro Tip: Use AI to generate 10 variations of your bullets or title, then manually select the best elements from each and combine them. AI accelerates ideation but requires human curation.
Amazon Listing Optimization Tools Comparison
Here are the best tools for streamlining your product page optimization process.
| Tool | Best For | Price Range | Key Feature | Rating |
|---|---|---|---|---|
| Helium 10 Listing Builder | Complete optimization | $29-$279/mo | AI-powered suggestions + keyword scoring | ⭐⭐⭐⭐⭐ |
| Jungle Scout Listing Optimizer | Beginner-friendly | $29-$129/mo | Step-by-step optimization guide | ⭐⭐⭐⭐ |
| SellerApp Listing Quality | Quality score tracking | $99-$299/mo | Real-time listing health score | ⭐⭐⭐⭐ |
| Viral Launch Listing Builder | Keyword-focused | $69-$199/mo | Keyword density analysis | ⭐⭐⭐⭐ |
| AMZOptimizer | Budget option | $47/mo | Basic optimization suggestions | ⭐⭐⭐ |
| Amazon’s Own Tools | Free baseline | Free | Manage Your Experiments (A/B testing) | ⭐⭐⭐⭐ |
Tool Selection Guide
Choose Helium 10 if: You’re managing 5+ products and need comprehensive data
Choose Jungle Scout if: You’re new to Amazon and want guided optimization
Choose SellerApp if: You want ongoing monitoring and alerts for listing health
Choose Amazon’s tools if: You’re testing the waters before investing in paid tools
Pro Tip: Start with Amazon’s free “Manage Your Experiments” feature. Test different main images and titles for 4-6 weeks. Once you see the impact of optimization, investing in premium tools becomes a no-brainer.
How Often Should You Update Your Amazon Listings?
Short answer: Monitor weekly, update monthly, or immediately when data demands it.
Your Listing Maintenance Schedule
Weekly Tasks (15 minutes):
- Check conversion rate trends
- Monitor competitor listing changes
- Review customer questions and answer promptly
- Check if you’re still in stock / inventory levels
Monthly Tasks (1-2 hours):
- Analyze Search Term Report from PPC campaigns
- Update backend keywords based on performance data
- Read new customer reviews and identify optimization opportunities
- Refresh at least one image (seasonal or based on feedback)
- Test one element via A/B testing
Quarterly Tasks (3-4 hours):
- Complete listing audit using checklist above
- Major image refresh if needed
- Rewrite bullets if customer language has evolved
- Update A+ Content with new modules or seasonal content
- Competitive analysis (how have top sellers changed?)
Immediate Updates Required When:
- Major ranking drop (check for policy violations or suppressed content)
- Conversion rate suddenly drops 20%+ (something broke or competitor improved)
- New competitor dominates (analyze their listing and adapt)
- Major holiday/season approaching (seasonal optimization)
- Product receives multiple similar complaints (address in listing)
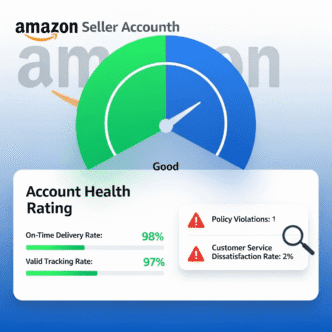
For ongoing performance tracking strategies, see our guide on Amazon account health.
Advanced Listing Optimization Tactics for 2025
Ready to go beyond the basics? These advanced listing quality score boosters separate six-figure sellers from everyone else.
Tactic #1: Seasonal Content Rotation
Your listing doesn’t need to be static. Smart sellers rotate content seasonally:
Summer (May-August):
- Update main image to show outdoor/beach use if applicable
- Adjust bullets to emphasize portability, durability, weather resistance
- A+ Content shows summer lifestyle scenarios
Fall/Winter (September-January):
- Show indoor/cozy use scenarios
- Emphasize gift-giving benefits (October-December)
- Highlight features relevant to cold weather
Back-to-School (July-September):
- For relevant products, show student/dorm use
- Emphasize organization, space-saving, affordability
Tactic #2: Review Mining for Listing Updates
Your customer reviews are a goldmine for optimization:
Read 50 most recent 5-star reviews:
- What features do customers mention repeatedly? (Highlight these more prominently)
- What unexpected uses do they mention? (Add these use cases to bullets)
- What words do they use? (Incorporate this language)
Read all 1-star and 2-star reviews:
- What complaints appear in 3+ reviews? (Address these proactively in bullets)
- What misconceptions exist? (Clarify in description)
- What’s missing that they expected? (Add to package contents or adjust expectations)
Pro Tip: Create a monthly review report. Track themes that appear in both positive and negative reviews. This is free market research telling you exactly what to optimize.
Tactic #3: Competitor Gap Analysis
Most sellers analyze what competitors do well. Smart sellers find what competitors do poorly:
Find the #1 seller in your category
Read their 3-star reviews (these reveal weaknesses)
Optimize your listing to address those exact weaknesses
Example: If multiple reviews say “shipping box was damaged,” emphasize your “premium protective packaging” in bullets. Instant differentiation.
Tactic #4: The Video Advantage
Product videos can increase conversions by 10-30%, yet most sellers don’t use them.
Video Best Practices:
- Keep it under 60 seconds (attention spans are short)
- Show product in actual use (not just rotating on white background)
- Demonstrate key features visibly
- No audio required (most people watch with sound off)
- Mobile-optimized (vertical or square format works best)
Upload videos to both your main gallery AND A+ Content for maximum visibility.
Tactic #5: Question Seeding
The Q&A section is indexed by Amazon’s search algorithm. Proactively add questions (from a separate account) that:
Contain important keywords (“Does this work with iPhone 15 Pro Max?”)
Address common objections (“Is this really waterproof for swimming?”)
Highlight key features (“How long does the battery actually last?”)
Then answer thoroughly with keyword-rich, detailed responses. This content helps both SEO and customer confidence.
Pro Tip: Check your Q&A section weekly. Answer new questions within 24 hours. Fast, helpful responses build trust and improve conversion rates.
What’s the ROI of Professional Listing Optimization?
Let’s talk numbers. Is investing time and money into complete Amazon listing optimization actually worth it?
Real ROI Calculation
Scenario: You’re selling a $40 product with 1,000 monthly sessions
Before Optimization:
- Conversion rate: 5%
- Monthly sales: 50 units
- Monthly revenue: $2,000
After Optimization:
- Conversion rate: 12% (conservative improvement)
- Monthly sales: 120 units
- Monthly revenue: $4,800
Monthly revenue increase: $2,800
Annual revenue increase: $33,600
Time invested in optimization: 20 hours
Hourly value of your optimization: $1,680/hour
Even if you hire a professional at $500-1,000 for listing optimization, the ROI is 33-66x in the first year alone.
The Compound Effect
But it’s actually better than this calculation suggests:
Higher sales velocity = better organic ranking = more free traffic
Better conversion rate = lower PPC costs = higher profit margins
More reviews from increased sales = social proof that drives more conversions
Improved BSR = eligibility for Amazon’s promotional placements
One-time optimization work creates a flywheel effect that compounds monthly.
Common Questions About Listing Optimization Length and Limits
Understanding Amazon’s technical limits helps you maximize every available space.
Character and Byte Limits by Element
Title: 200 characters (varies by category, some allow up to 250)
Bullet Points: 500 characters each (some categories allow 1,000)
Description: 2,000 characters (can use HTML for formatting)
Backend Keywords: 249 bytes (not characters—spaces count as 1 byte each)
A+ Content: No strict limit but 5-7 modules is optimal
Product Images: 9 maximum (use all of them)
Pro Tip: Different categories have different limits. Check Amazon’s style guides for your specific category: Amazon Style Guide Resources
How Mobile Optimization Impacts Listing Performance
With 65% of purchases on mobile, optimizing for smaller screens isn’t optional anymore.
Mobile-Specific Optimization Checklist
Title Optimization for Mobile:
- First 60-80 characters are visible before truncation
- Front-load brand name and primary keyword
- Test how your title appears on iPhone and Android
Image Optimization for Mobile:
- Text on infographics must be 40pt+ font minimum
- Main image should clearly show product even at thumbnail size
- Use high contrast (white text on dark background or vice versa)
- One focal point per image (no cluttered compositions)
Bullet Point Optimization for Mobile:
- First 2-3 bullets are most visible (prioritize these)
- Shorter bullets (150-200 characters) are more mobile-friendly
- Break up long bullets with line breaks if possible
A+ Content for Mobile:
- Preview every module on actual mobile device
- Avoid text-heavy modules (customers won’t read them)
- Use image-dominant layouts
- Test all modules in portrait mode
Pro Tip: Amazon’s mobile app and mobile browser display differently. Test on both before finalizing any changes.
Final Thoughts: Your Listing Optimization Action Plan
You now have everything you need for world-class Amazon listing optimization.
Here’s your step-by-step action plan:
Week 1: Foundation
Day 1-2: Complete title optimization using the formula and best practices
Day 3-4: Rewrite all 5 bullets using Feature-Benefit formula
Day 5: Update backend keywords to 249 bytes
Day 6-7: Review and improve product description
Week 2: Visual Assets
Day 1-3: Audit all images, identify which need replacement
Day 4-5: Create/source new lifestyle and infographic images
Day 6-7: Upload new images, test mobile display
Week 3: Enhanced Content
Day 1-3: Create or update A+ Content (if brand registered)
Day 4-5: Add product video if possible
Day 6-7: Seed Q&A section with strategic questions
Week 4: Testing and Monitoring
Day 1-2: Set up Manage Your Experiments for A/B testing
Day 3-4: Review all changes on mobile and desktop
Day 5: Launch optimized listing
Day 6-7: Monitor initial performance metrics
Ongoing Maintenance
Weekly: Check conversion rates and answer customer questions
Monthly: Review Search Term Reports, update backend keywords, test one new element
Quarterly: Complete full listing audit, refresh seasonal content
Remember: Optimization is never “done.” The most successful sellers on Amazon treat their listings as living documents that evolve with customer needs and market trends.
Your competitors are either optimizing constantly or falling behind. Which side do you want to be on?
For the complete Amazon strategy including keyword research, PPC, and reviews, check out our comprehensive Amazon SEO guide.
Start with your highest-revenue product. Optimize it fully using this guide. Measure the results after 30 days. Then systematically optimize your entire catalog.
The difference between a mediocre listing and an optimized one is often the difference between struggling to break even and building a six-figure business.
Your products deserve to be seen, clicked, and purchased. Now you know exactly how to make that happen.
Frequently Asked Questions
Q: How long does it take to see results after optimizing a listing?
You’ll typically see initial improvements within 1-2 weeks, especially in conversion rate. Ranking improvements take 3-4 weeks as Amazon’s algorithm processes your performance changes. Full impact is usually visible within 60 days, assuming you’re also running some PPC to boost sales velocity.
Q: Can I optimize my listing too much and hurt my rankings?
Yes, if you make too many changes at once or change things too frequently. Amazon’s algorithm needs time to assess performance after each change. Make one major update per week maximum, and let it stabilize for 7-14 days before making another significant change. Constant tweaking prevents the algorithm from understanding what’s actually working.
Q: Should I use all 5 bullet points even if I run out of things to say?
Absolutely. Unused bullet points are wasted opportunities. If you’re struggling to fill all 5, you’re not thinking creatively enough about benefits, use cases, quality assurance, warranty information, or customer service commitments. Every product has at least 5 compelling points to make.
Q: Is it better to have a keyword-rich title or a readable title?
Readable title wins every time in 2025. Amazon’s algorithm is sophisticated enough to understand semantic relationships and synonyms. A spammy, keyword-stuffed title hurts your click-through rate, which ultimately hurts your rankings. Prioritize human readability while naturally incorporating 5-7 key terms.
Q: Can I copy my competitor’s listing if they’re ranking #1?
Legally yes, ethically questionable, strategically dumb. Copying means you’re competing head-to-head with zero differentiation. Learn from their structure and approach, but find unique angles they’re missing. Your goal is to be better, not identical. Plus, Amazon rewards listing diversity—identical content can get flagged.
Q: How important are product dimensions and technical specifications?
Extremely important. These details appear in comparison shopping and help customers make informed decisions. Missing specifications increase returns (customers got wrong size) and negative reviews. Always fill out every possible attribute field in Seller Central, even if they seem minor.
Q: Should I update my listing if it’s already ranking well?
Yes, but cautiously. Even well-performing listings can be improved incrementally. Use Amazon’s A/B testing feature to test new variations without risking your current rankings. Focus on conversion rate improvements rather than major keyword overhauls.
Q: What if my product images keep getting rejected by Amazon?
Read Amazon’s image requirements for your specific category carefully—they vary. Common rejection reasons: background isn’t pure white (RGB 255,255,255), product doesn’t fill 85% of frame, includes prohibited text/logos, or shows product in packaging. Use Amazon’s Image Rejection Issues report in Seller Central for specific guidance.
Q: How do I optimize for international Amazon marketplaces?
Don’t just translate—localize. Research keywords specific to each marketplace, understand cultural preferences, and adjust imagery to match local expectations. UK customers search differently than US customers even though both speak English. Use native speakers for translation and cultural review.
Q: Does listing optimization help with Amazon’s Choice or Best Seller badges?
Indirectly, yes. These badges are performance-based: Amazon’s Choice considers price, availability, and customer ratings; Best Seller is purely sales rank in category. Better listing optimization → more sales → better chance of earning these badges, which then drive even more sales.
Q: Should I optimize differently for different product price points?
Yes. Lower-priced products ($10-25) need to emphasize value and bundle contents. Mid-priced ($25-75) should focus on quality and features. Premium products ($75+) require extensive imagery, detailed descriptions, and strong brand storytelling. Adjust your optimization strategy to match your price positioning.
📊 Listing Optimization Impact Statistics
📈 Optimization Impact on Conversion Rates
🔧 Title Optimization Analyzer
Title Analysis Results:
⭐ Complete Listing Quality Score
Enter listing details
Complete the form above to see your optimization score
💰 Listing Optimization ROI Calculator
Your Optimization ROI:
📋 Listing Element Impact Comparison
| Listing Element | Impact on Visibility | Impact on Conversion | Optimization Priority |
|---|---|---|---|
| Title | Very High | High | 🔥 Critical |
| Main Image | High | Very High | 🔥 Critical |
| Bullet Points | High | Very High | 🔥 Critical |
| Backend Keywords | Very High | Low | ⚡ High |
| Secondary Images | Medium | High | ⚡ High |
| A+ Content | Low | Medium | ✓ Medium |
| Product Video | Low | High | ✓ Medium |
| Description | Medium | Low | ○ Low |
✅ Complete Optimization Checklist
Title & Keywords
- Title 150-200 characters
- Primary keyword in first 5 words
- Brand name included
- No keyword stuffing
- Backend keywords maxed out
Images & Visual
- 7-9 high-quality images
- Main image white background
- Lifestyle images included
- Infographic with features
- Product video added
Content & Copy
- All 5 bullets filled
- Feature-benefit format used
- Description optimized
- A+ Content created
- Q&A section monitored
Technical & Data
- All attributes filled
- Proper categorization
- Mobile preview checked
- A/B testing set up
- Performance tracking active
🎯 Listing Optimization Conversion Funnel
📊 Optimization Impact: Before vs After
8-Week Performance Progression
| Week | Before Optimization | After Optimization | Improvement |
|---|---|---|---|
| Week 1 | 45 units | 45 units | 0% |
| Week 2 | 43 units | 48 units | +12% |
| Week 3 | 47 units | 62 units | +32% |
| Week 4 | 44 units | 78 units | +77% |
| Week 5 | 46 units | 95 units | +107% |
| Week 6 | 45 units | 110 units | +144% |
| Week 7 | 44 units | 118 units | +168% |
| Week 8 | 46 units | 125 units | +172% |
📈 Key Takeaway
Complete listing optimization resulted in a 178% increase in daily sales over 8 weeks. The optimized listing went from 45 units/day to 125 units/day without any increase in ad spend. This demonstrates the compound effect of proper title, images, bullets, and A+ Content optimization.
🚀 Powered by SEOPROJOURNAL.COM | Amazon Listing Optimization Mastery